I really find the Maps module counterintuitive. And the documentation is little or no help!
What I want to do is set a start and end point for a zoom. In this instance I’d like to start with a 16:9 map of Central America and end in the specific area of El Salvador where I took my photographic trip. I can’t for the life of me fathom out what settings to apply. For example, what for heaven’s sake is the difference between the two rectangles, Map and Stage, and why can’t I set them separately from each other?
Please Boinx, make this model more usable!
Meanwhile, help appreciated in achieving what I want.
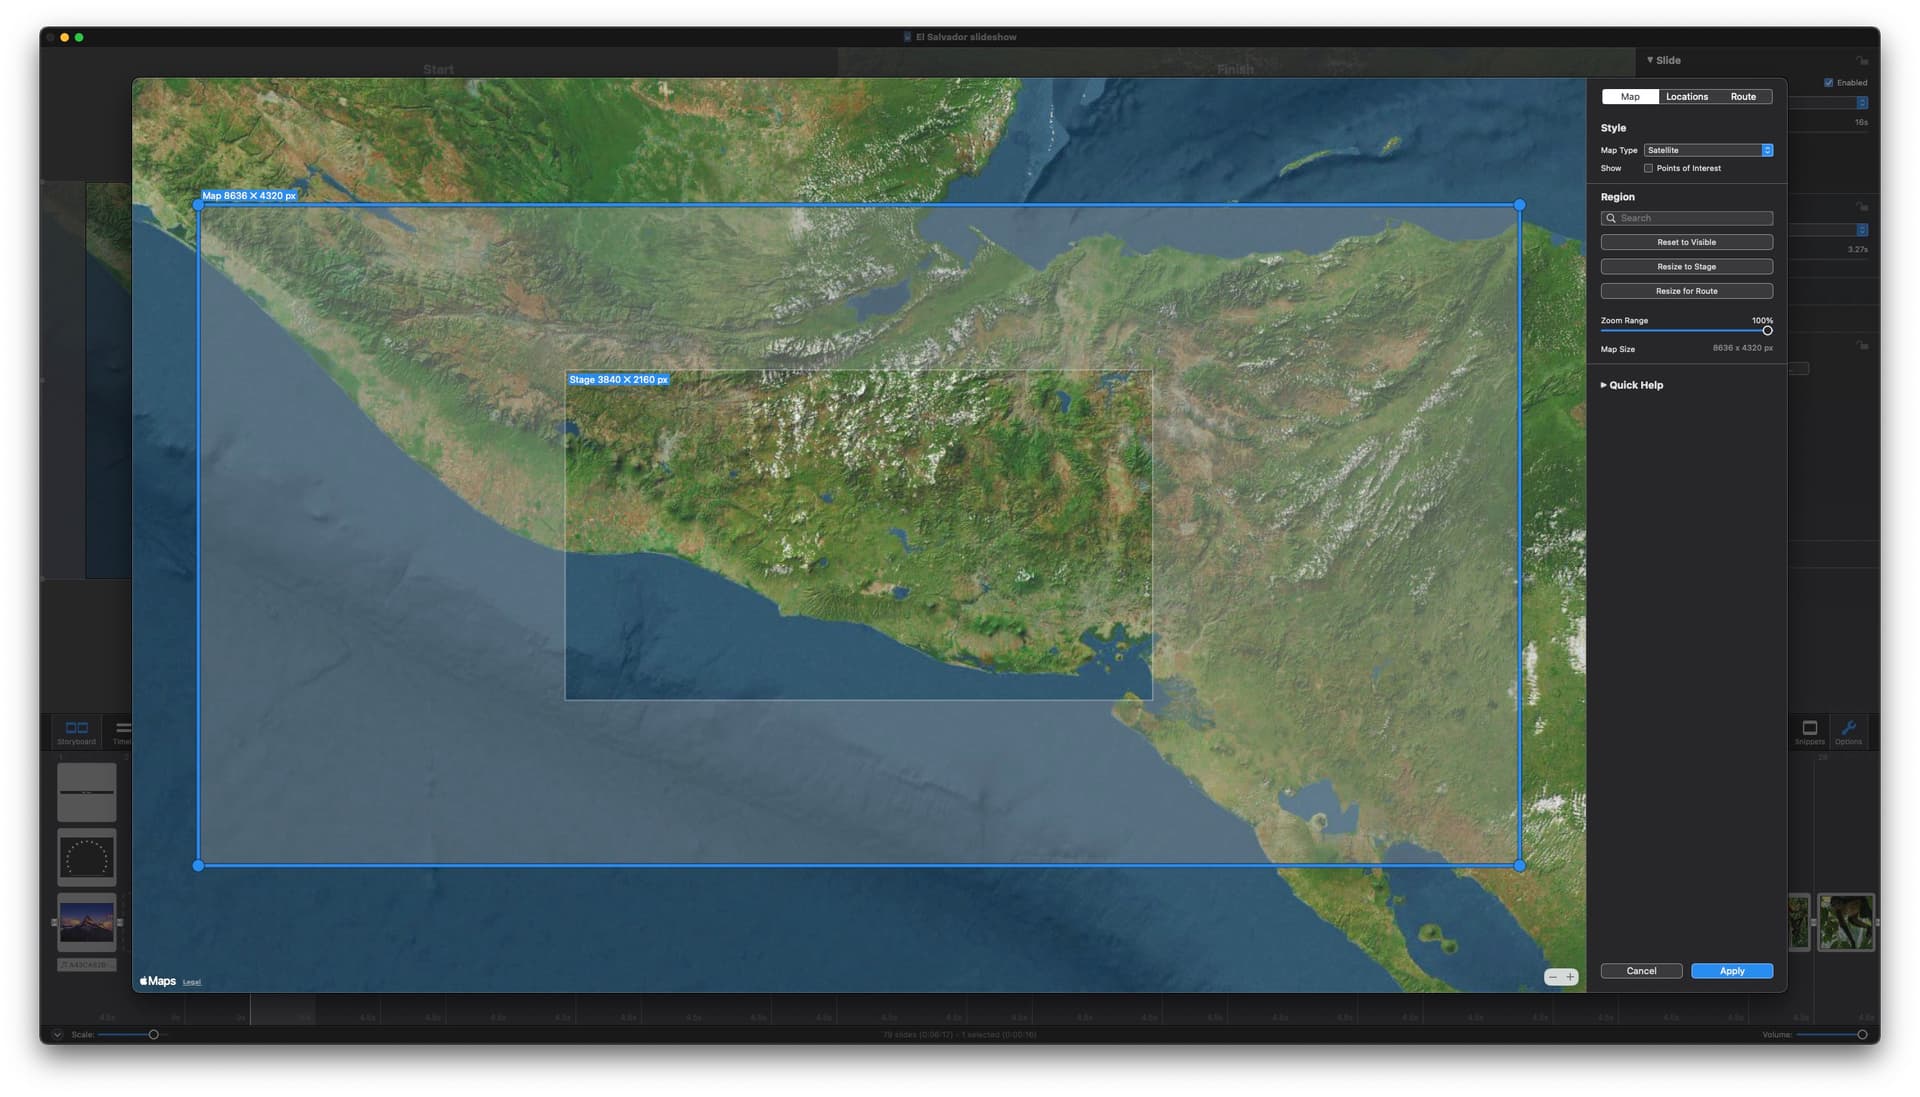
I’m gonna take a stab at this one ![]() The inner rectangle, if you look at the dimensions for it at the top left, represents that part of the image that fits into your stage (in this case, a 16:9 ratio of 3840 x 2160) at 100%. The outer rectangle represents the maximum area that you are selecting (in this case, 8636 x 4320). If you click on the OK/Apply button to place the map – at 100% – the inner portion will fit the stage while the outer portion will extend off the stage both left/right and top/bottom. As you Zoom Out on the stage then the map becomes smaller and smaller until the maximum amount of the map that you selected while in the Map Assistant can now be shown on the stage. If you continue to Zoom Out, then you’ll have a black border (or whatever your background color is) around the map, where your maximum selection would be.
The inner rectangle, if you look at the dimensions for it at the top left, represents that part of the image that fits into your stage (in this case, a 16:9 ratio of 3840 x 2160) at 100%. The outer rectangle represents the maximum area that you are selecting (in this case, 8636 x 4320). If you click on the OK/Apply button to place the map – at 100% – the inner portion will fit the stage while the outer portion will extend off the stage both left/right and top/bottom. As you Zoom Out on the stage then the map becomes smaller and smaller until the maximum amount of the map that you selected while in the Map Assistant can now be shown on the stage. If you continue to Zoom Out, then you’ll have a black border (or whatever your background color is) around the map, where your maximum selection would be.
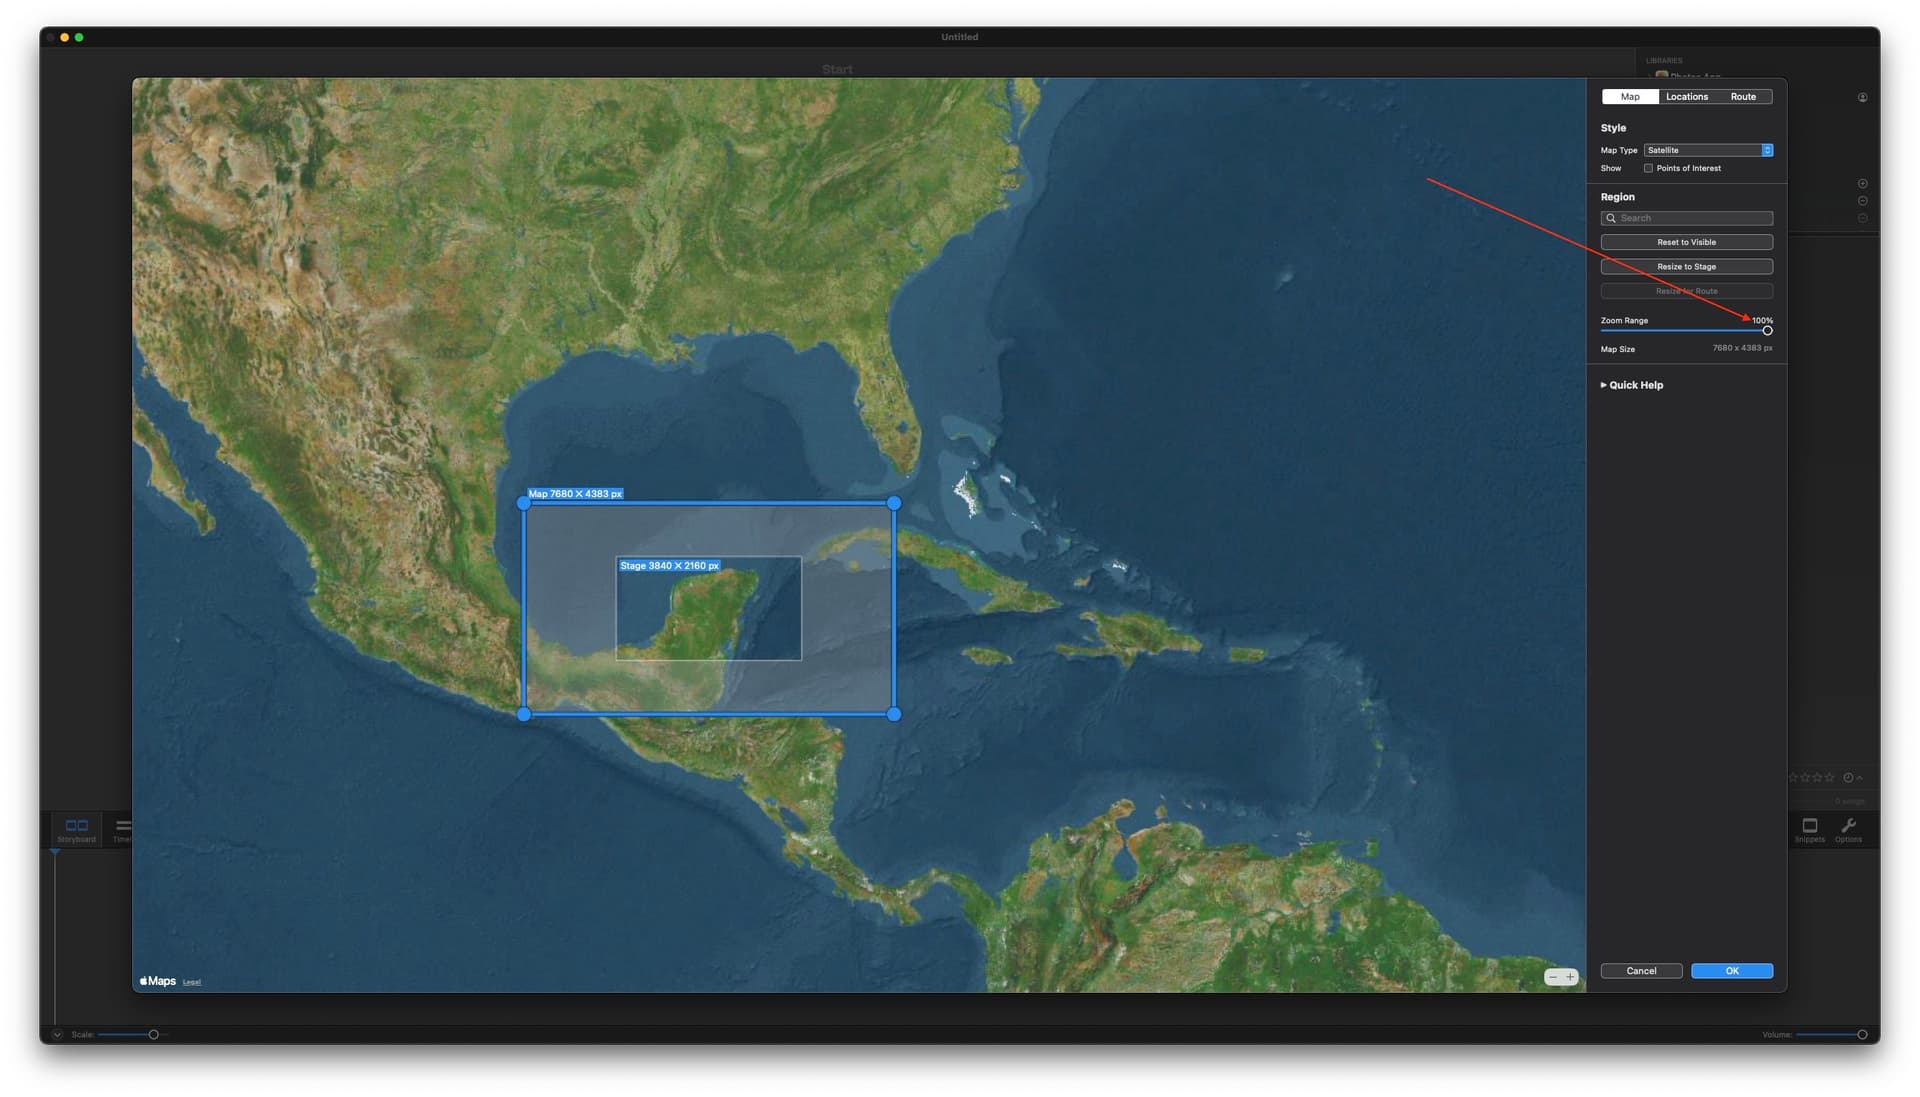
While in the Map Assistant, by moving any of the four corners of the outer rectangle – AND – by using the Zoom Range slider on the right side – AND – by adjusting the zoom of the map itself using the -/+ adjustment buttons at the bottom right of the map, you can adjust your imported map to fit your final requirements. It’s best to use the -/+ buttons to get the most of what you want to fit into the Stage area (the inner rectangle). That way you’ll get better resolution (sharpness) of the map itself at 100%. If you select too much initially and then try to Zoom In, the text and roads, and map detail, etc., will begin to get blurry and pixelated.
It is a bit confusing, I’ll agree. After I wrote the above and re-read it, I think I’m more confused than when I started typing ![]() It does take some experimenting and practice to get it the way you want.
It does take some experimenting and practice to get it the way you want.
Good luck…
Thanks. The fact that you got discombobulated trying to explain it is certainly an indication of how counter-intuitive it all is. Maybe it is clear in German!
Anyway. I think I am getting there.
My initial problem was with the zoom range slider, which only goes to 100% and therefore gives an opening stage that might be large enough.
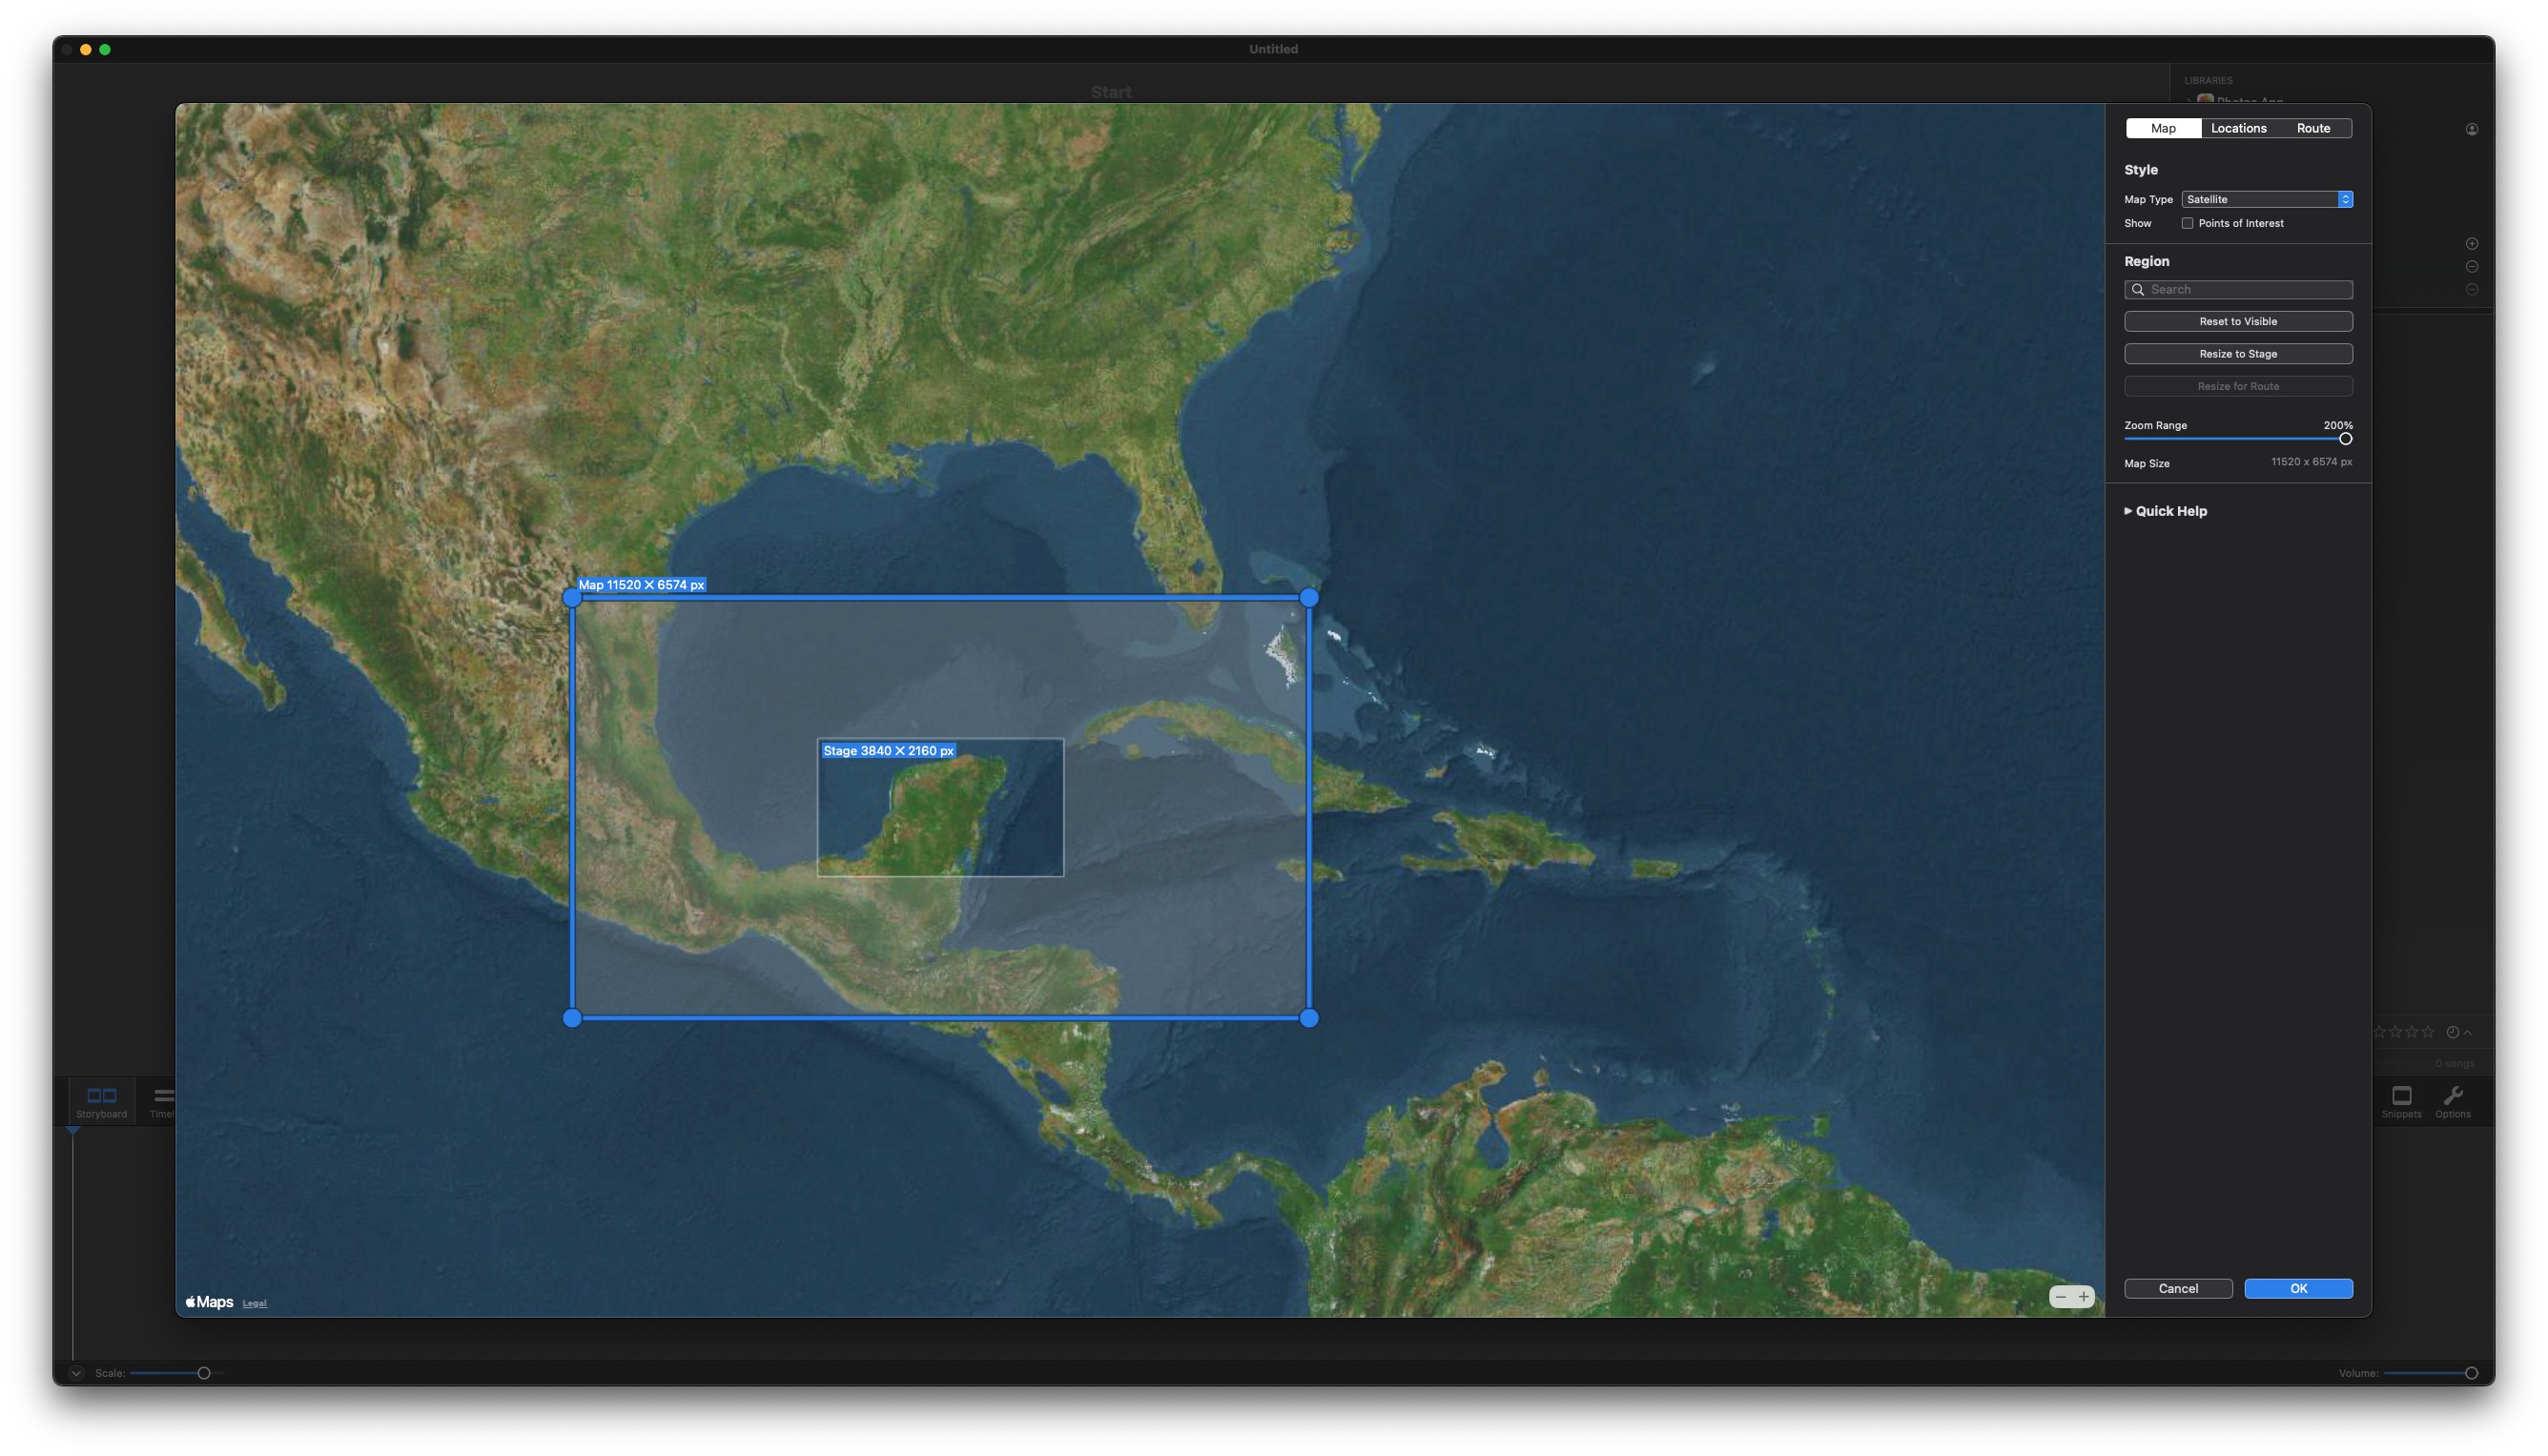
I then realised that the percentage can be changed manually by clicking on the number. I experimented with different percentages and finally settled on 200.
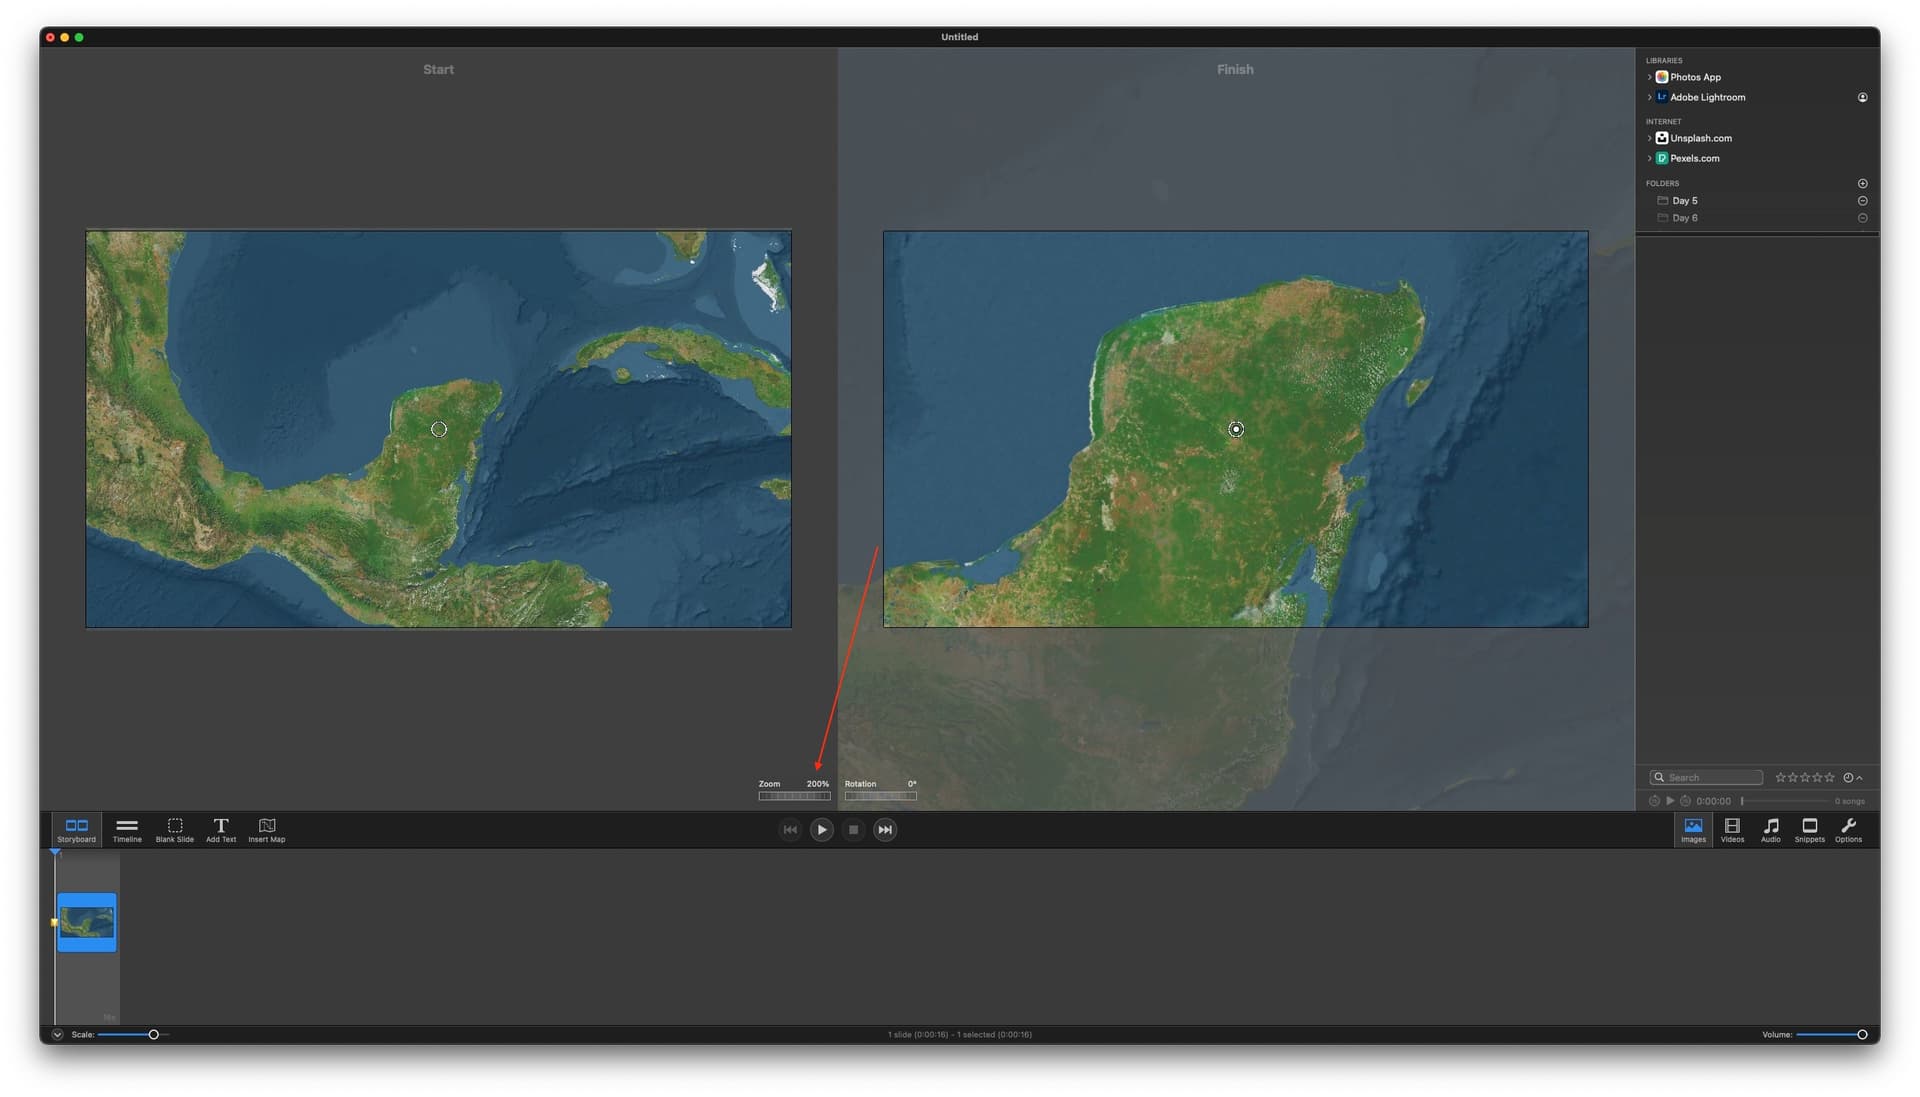
Then, in order to animate the zoom I then had to also manually set the zoom to 200 in the right hand panel
Next I have to work out how to import a GPX file from the GAI GPS website. When I tried this before FM did not recognise it. Is this a known bug?
Glad you got closer to your goal ![]() As for the GPX file import from the GAI GPS website, I can’t answer that since I’ve never done it and I’m not familiar with it – sorry
As for the GPX file import from the GAI GPS website, I can’t answer that since I’ve never done it and I’m not familiar with it – sorry ![]()
I have found another website that generates GPX files that ARE recognised. It will do rail and road routes as well as hiking trails so it’s actually better. It’s called BRouter just in case others are interested:
https://brouter.damsy.net
Trial and error indicates that the maximum zoom that can currently be achieved with the Maps module is about 320%. I have raised this with Support, since I would like to be able to achieve something more dramatic from time to time.