I know – it’s kinda hard to explain things when a “show and tell” works better 
Start with the left (Start) side. Can you double check the masks for the two images and make sure they are both set correctly. Not just to fit the image, but did you DRAG the top, bottom, left, and right to mask the left 1/3 of the entire frame. Then Copy Geometry of that mask and on the Finish side, do a Paste Geometry of the mask. That should guarantee both masks are the same. Then do the same for the right 2/3 of the frame on the Start side – make sure the left edge of the mask on the right bumps up against the right edge of the mask on the left – they should meet at the 1/3 - 2/3 location. It’s unfortunate that we can’t SEE those masks at the same time, or that the mask edges don’t SNAP to edges like the image edges do (I’ve been asking for that for years and still haven’t seen it implemented). Also, you realize that when you drag the mask edges there should be a small pop-up size marker near your mouse pointer that shows the dimensions of the mask. You can use that for assistance as well.
So now you should have masks for both the start and finish, and both should be of equal size and in the same location. Now do what you want to both images (zoom, rotate, pan, etc). for both the left and right. Then click on the Is Placeholder for each, and save as a snippet. Now try placing the snippet, and then drag images to the placeholders. The masks SHOULD HOLD, but the images need to be adjusted. I’ll work on some images and see if I can add them to this post, or in a following one.
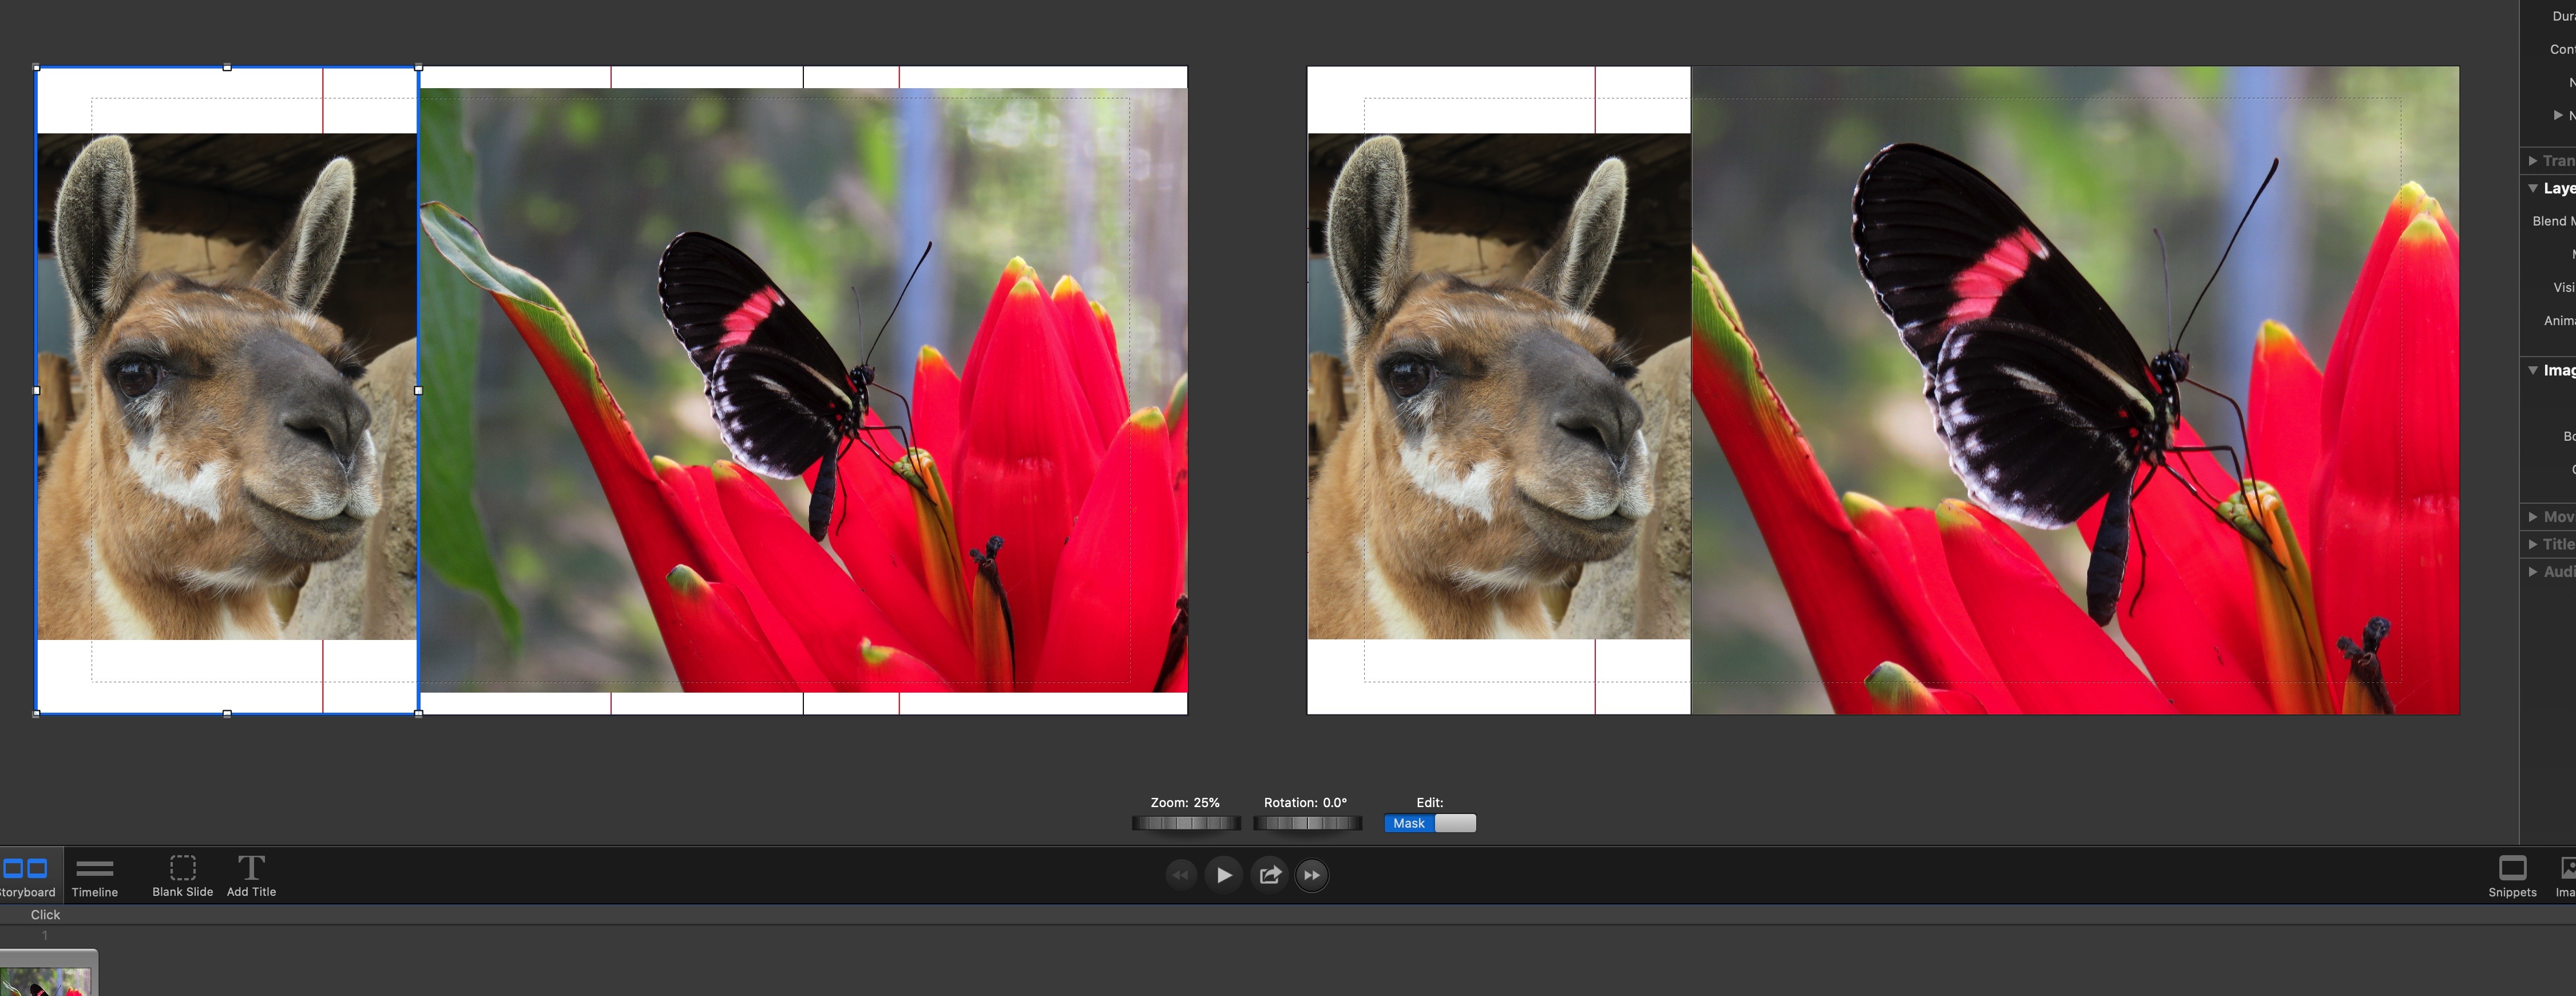
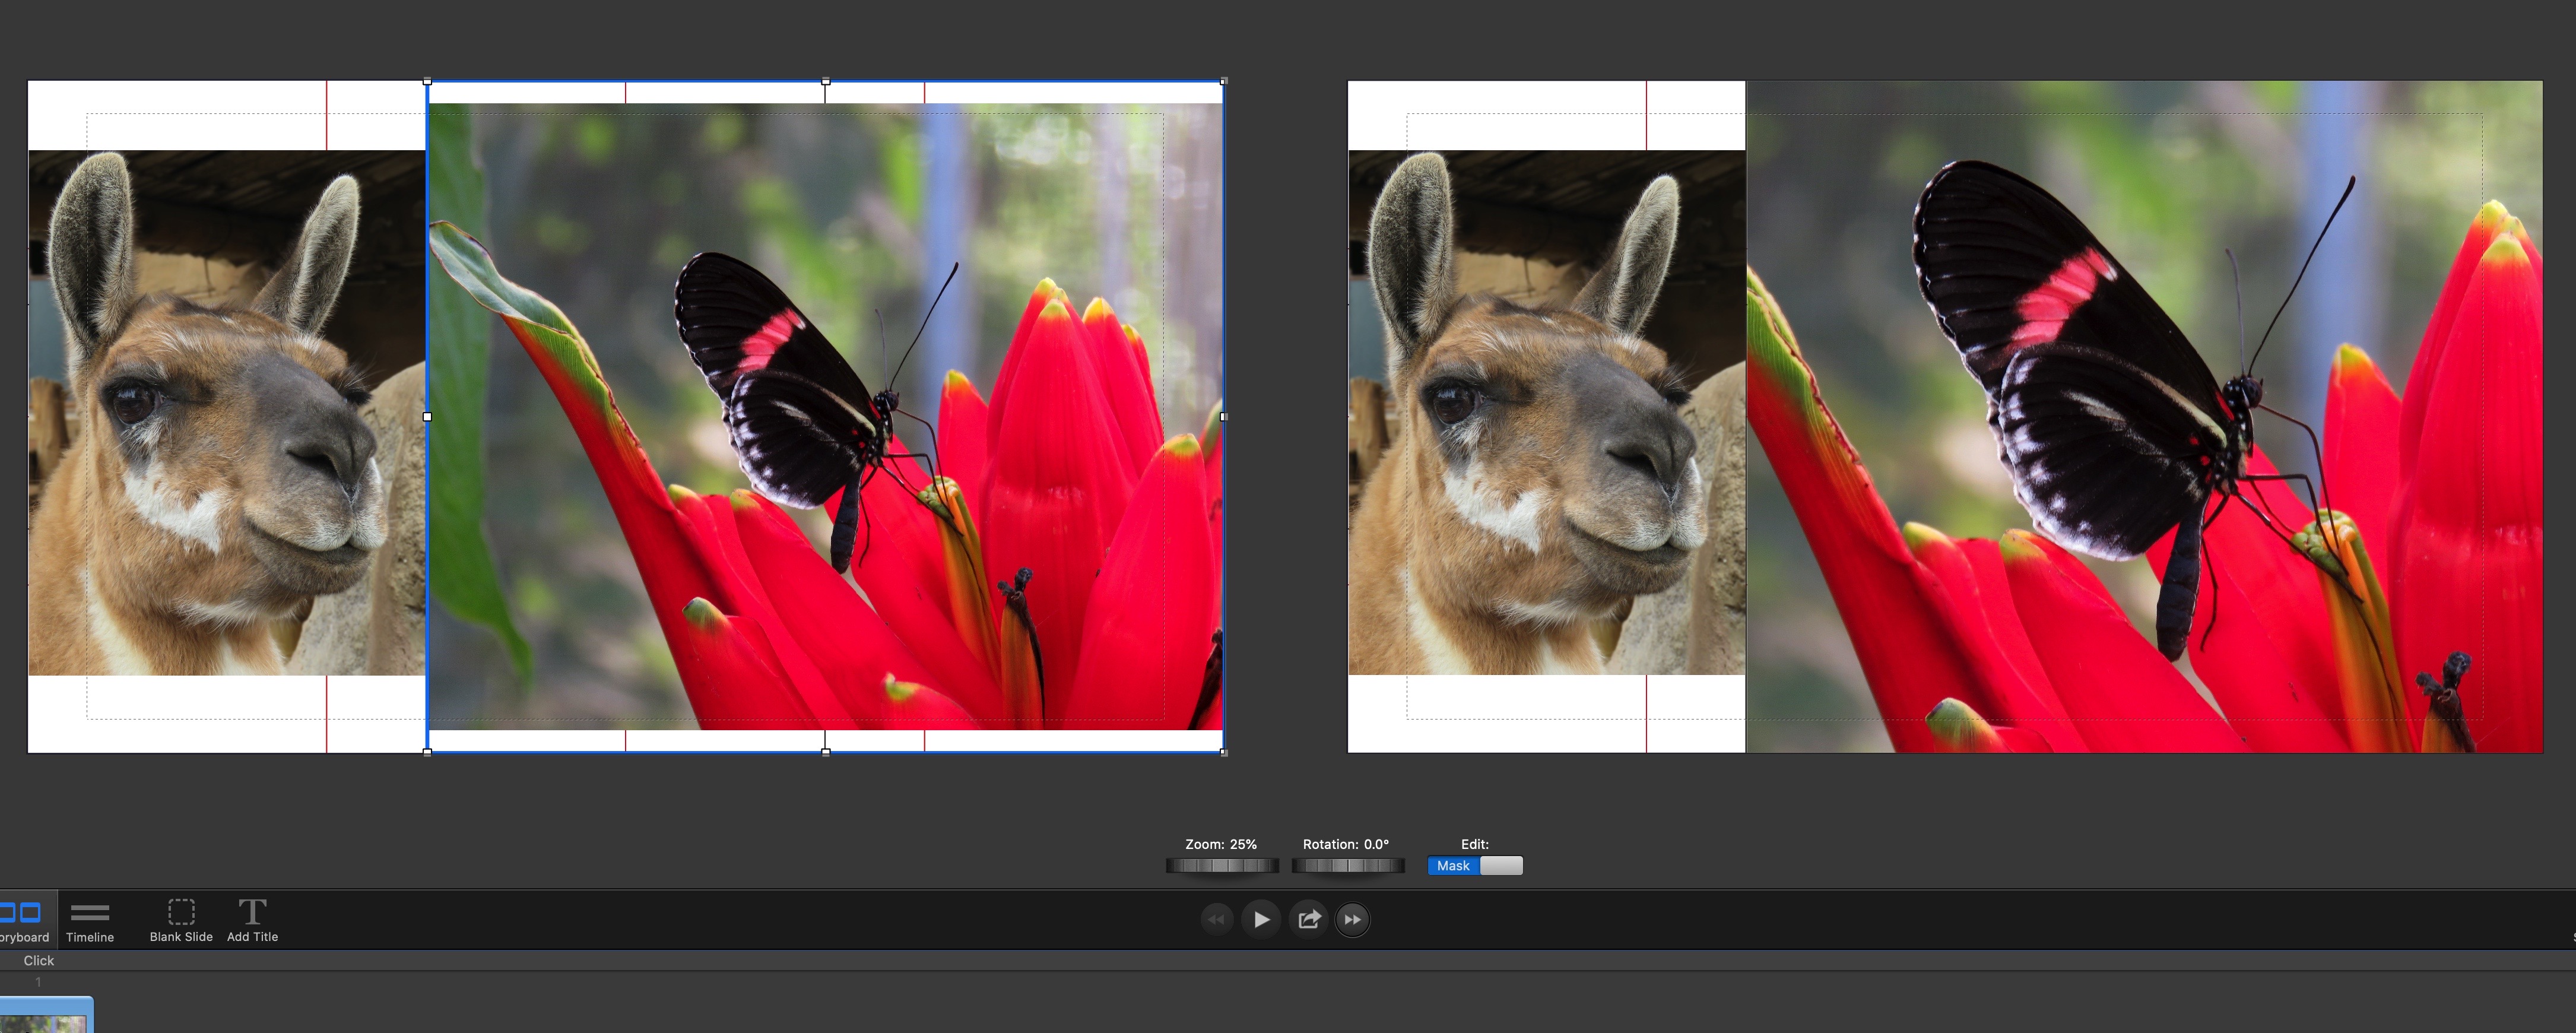
Okay, might be hard to see, but where the two images touch is where the masks touch. I’ve zoomed the image of the butterfly on the right, but it still doesn’t overlap the image on the left because the mask stops it at that point.
Keep playing with it and see what you get. If you haven’t done it before, it takes a bit of practice. Let me know if you’re getting closer 