I’d like to be able to split my 16:9 screen with one image filling the left hand third of the screen and a second image filling the other two-thirds. It seems this can be done with the edit geometry function but I can’t see how to carry this over in an animation or whether it can be saved for regular use.
I’m not quite following you when you say “…how to carry this over in an animation…” Have you tried to create a Snippet with those parameters yet? If you know the exact dimensions of the 1/3 and 2/3 parts, drag an image to the timeline, click on the image and then add a rectangular mask. Drag each side of the mask so it fills the frame to take up the first 1/3 of the width of the frame, and align its left side with the left side of the frame. Now add another image and add a rectangular mask and do the same to that mask, except size it for 2/3 the width of the frame, and align its right side with the right side of the frame. You can obviously make adjustments to size and placement by moving the edges around. If you want to add an animation to each of the left or right sides, click on Options at the right side of the FM workspace, then click on Slide > Animation > and check “Enabled” then perform whatever animation you want for each side (rotate, move, zoom, etc. – just don’t change the mask locations!) For each of the images, right-click on each image and select File > Is Placeholder. Then save the snippet. When you then import the snippet into your slideshow, you should be able to drag new images on top of the placeholders, and the images will animate like you wanted. Of course, the animation will be the same for each image each time you use that snippet.
Does that explain it? Sorta? Too wordy? I try to explain things concisely so its easy to follow, but sometimes that’s hard to do. Hope that helps 
Thank you. I will take a look at your suggestions and try to come up with a solution. Of course, in an ideal world it should be possible to open a split screen snippet and drag the divider to the left or right and then save as a user preset!
Yep – that would be nice
For my purposes, I created a single .jpg “template” that’s divided into halves and thirds, both horizontally and vertically (using different color lines as markers). If I want to divide a frame into those specific proportions (1/2 and 1/2, or 1/3 and 2/3, or 2/3 and 1/3, etc.), I drop that onto the slide as my base layer, then place new images on top and size the masks to align with the “markers” on that template. Then adjust the image within the mask the way I want it. When I’m done, I just delete the template from that slide. Just a suggestion…
Thanks for your patience. I am still not getting it I’m afraid. The exact dimensions are not so important, but if I drag a photo that’s in portrait format to the left side of the frame and then another to the right side, I cannot get them to align without the second overlapping the first!

Both the start and Finish images have both Mask/rectangle and File/is placeholder checked.
I know – it’s kinda hard to explain things when a “show and tell” works better 
Start with the left (Start) side. Can you double check the masks for the two images and make sure they are both set correctly. Not just to fit the image, but did you DRAG the top, bottom, left, and right to mask the left 1/3 of the entire frame. Then Copy Geometry of that mask and on the Finish side, do a Paste Geometry of the mask. That should guarantee both masks are the same. Then do the same for the right 2/3 of the frame on the Start side – make sure the left edge of the mask on the right bumps up against the right edge of the mask on the left – they should meet at the 1/3 - 2/3 location. It’s unfortunate that we can’t SEE those masks at the same time, or that the mask edges don’t SNAP to edges like the image edges do (I’ve been asking for that for years and still haven’t seen it implemented). Also, you realize that when you drag the mask edges there should be a small pop-up size marker near your mouse pointer that shows the dimensions of the mask. You can use that for assistance as well.
So now you should have masks for both the start and finish, and both should be of equal size and in the same location. Now do what you want to both images (zoom, rotate, pan, etc). for both the left and right. Then click on the Is Placeholder for each, and save as a snippet. Now try placing the snippet, and then drag images to the placeholders. The masks SHOULD HOLD, but the images need to be adjusted. I’ll work on some images and see if I can add them to this post, or in a following one.
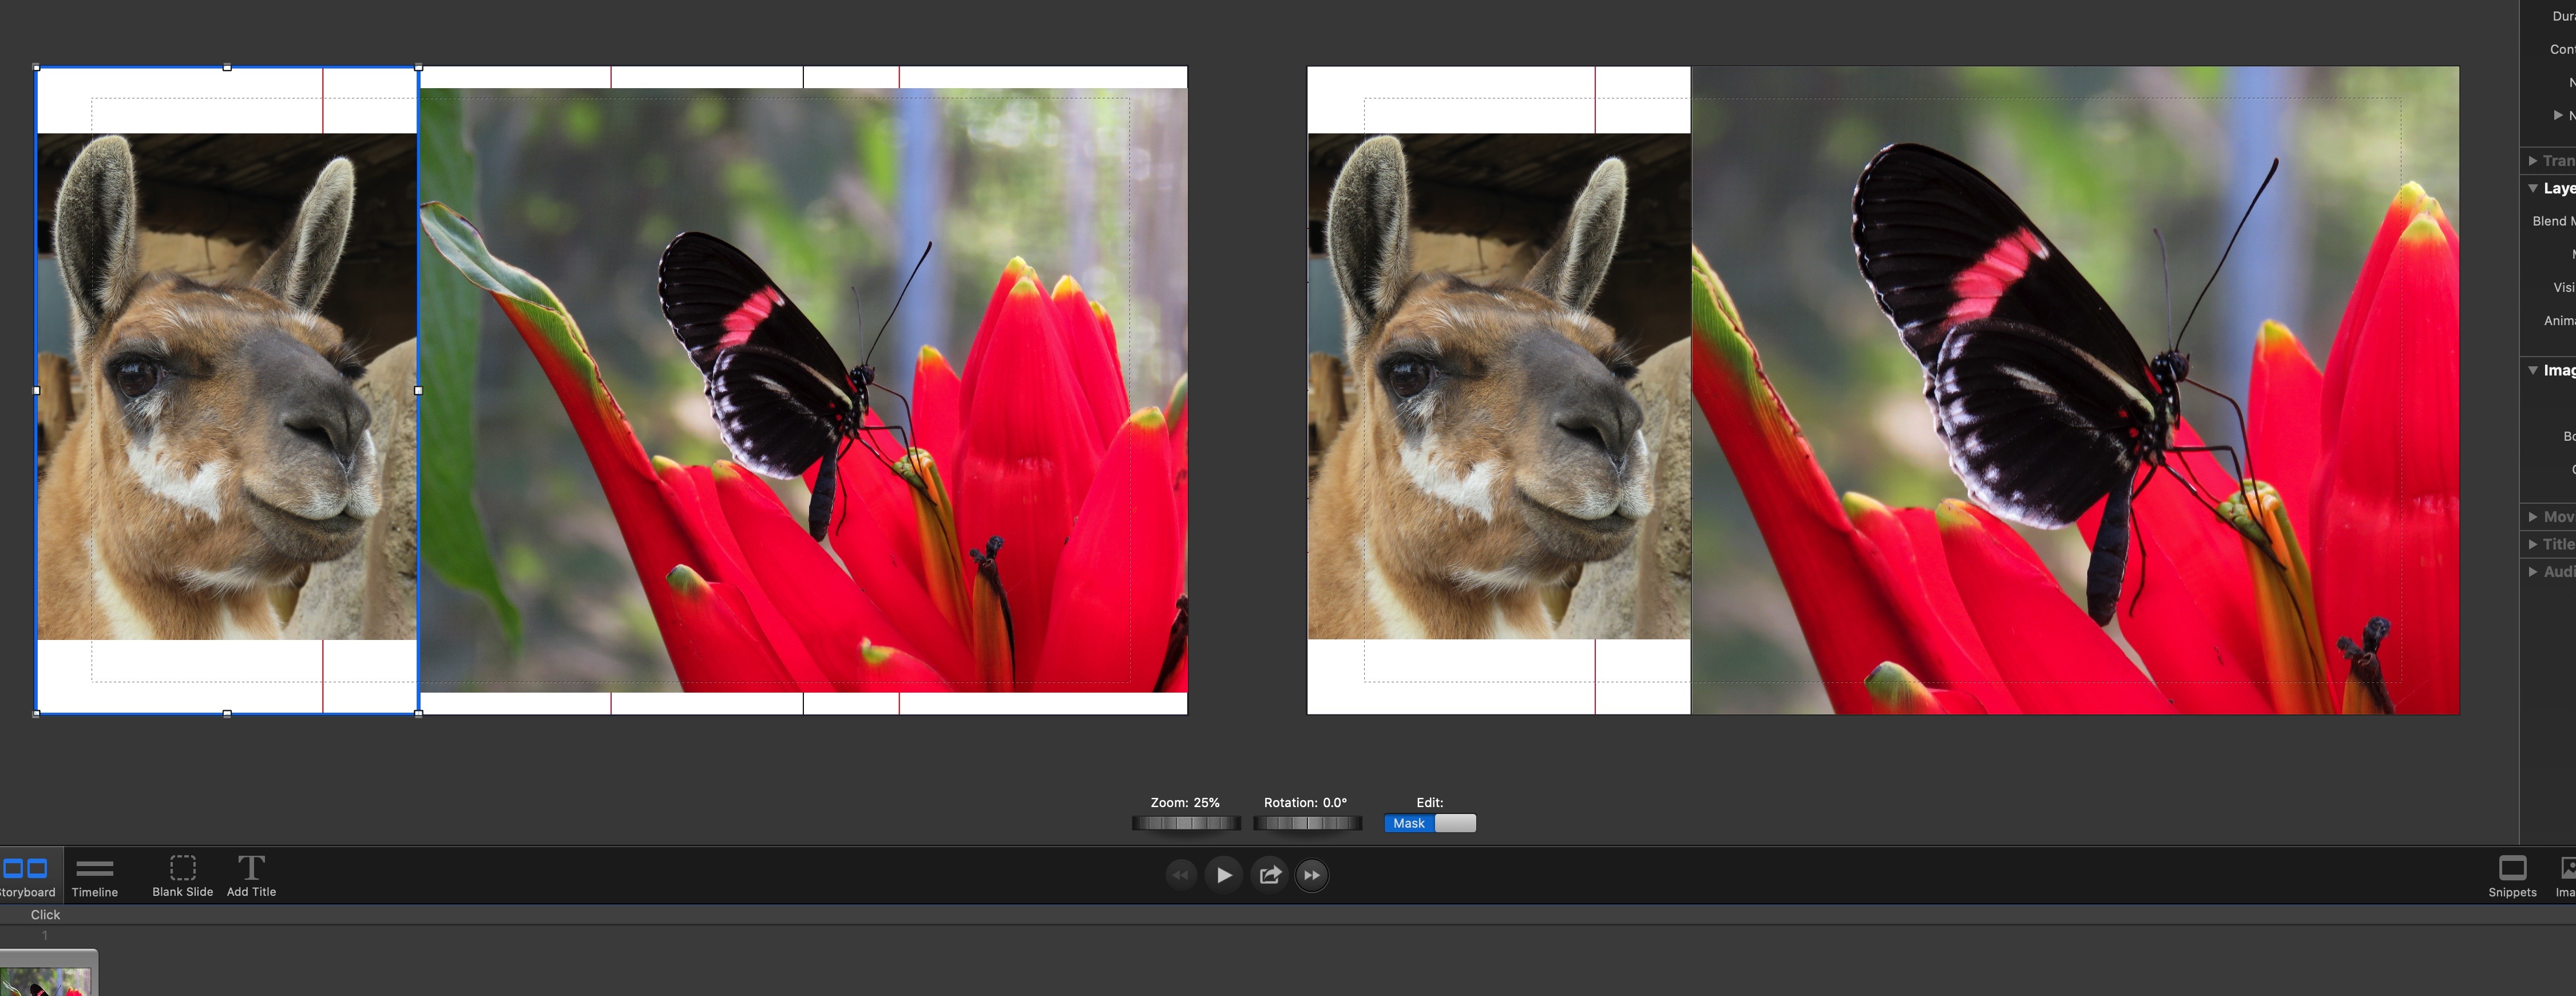
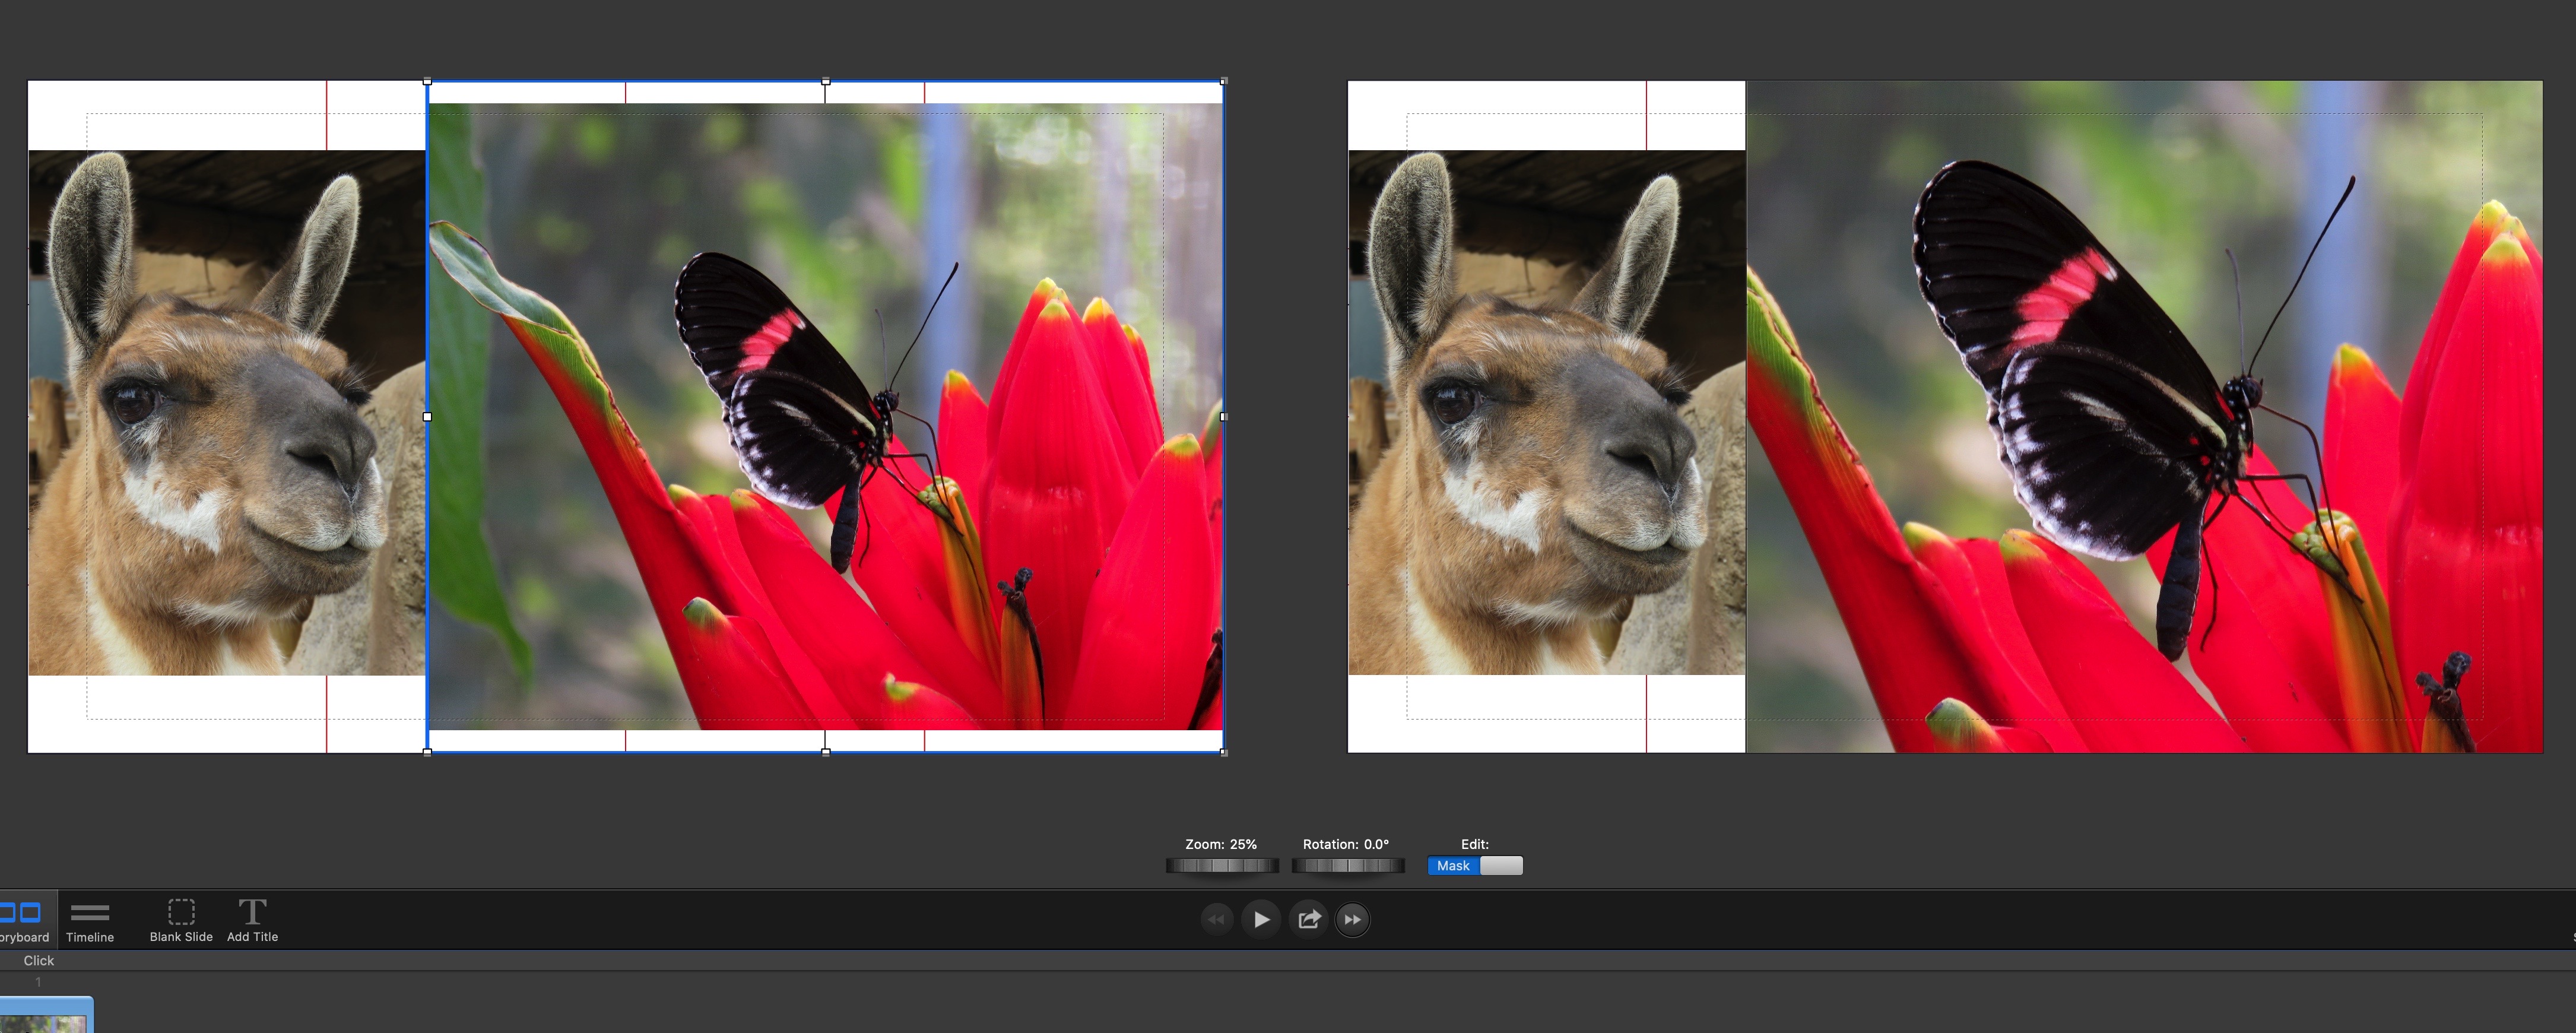
Okay, might be hard to see, but where the two images touch is where the masks touch. I’ve zoomed the image of the butterfly on the right, but it still doesn’t overlap the image on the left because the mask stops it at that point.
Keep playing with it and see what you get. If you haven’t done it before, it takes a bit of practice. Let me know if you’re getting closer
Thanks, that’s helpful again. I am going forward. The left hand image is the full portrait photo and is how I want it (so it doesn’t occupy a third of the screen, just approx). The y coordinates for both images are -7 and 0 respectively; should they be the same?
What I don’t seem to be able to do is 'crop the right hand image, so it fills the entirety of that side of the frame. But I have created the zoom effect I want on the right.
I have checked “Is Placeholder” and saved the snippet. However, it has saved the entire slideshow. I was rather hoping it would just save the framework of that particular split screen. Maybe I am doing something wrong still.
Thanks again for your help.
Hi again. I have now worked out how to place the right-hand image to fill the screen in the correct architectural proportion! That is to place it first and then add the left-hand image. The right-hand one can then be tweaked and zoomed accordingly. Phew.
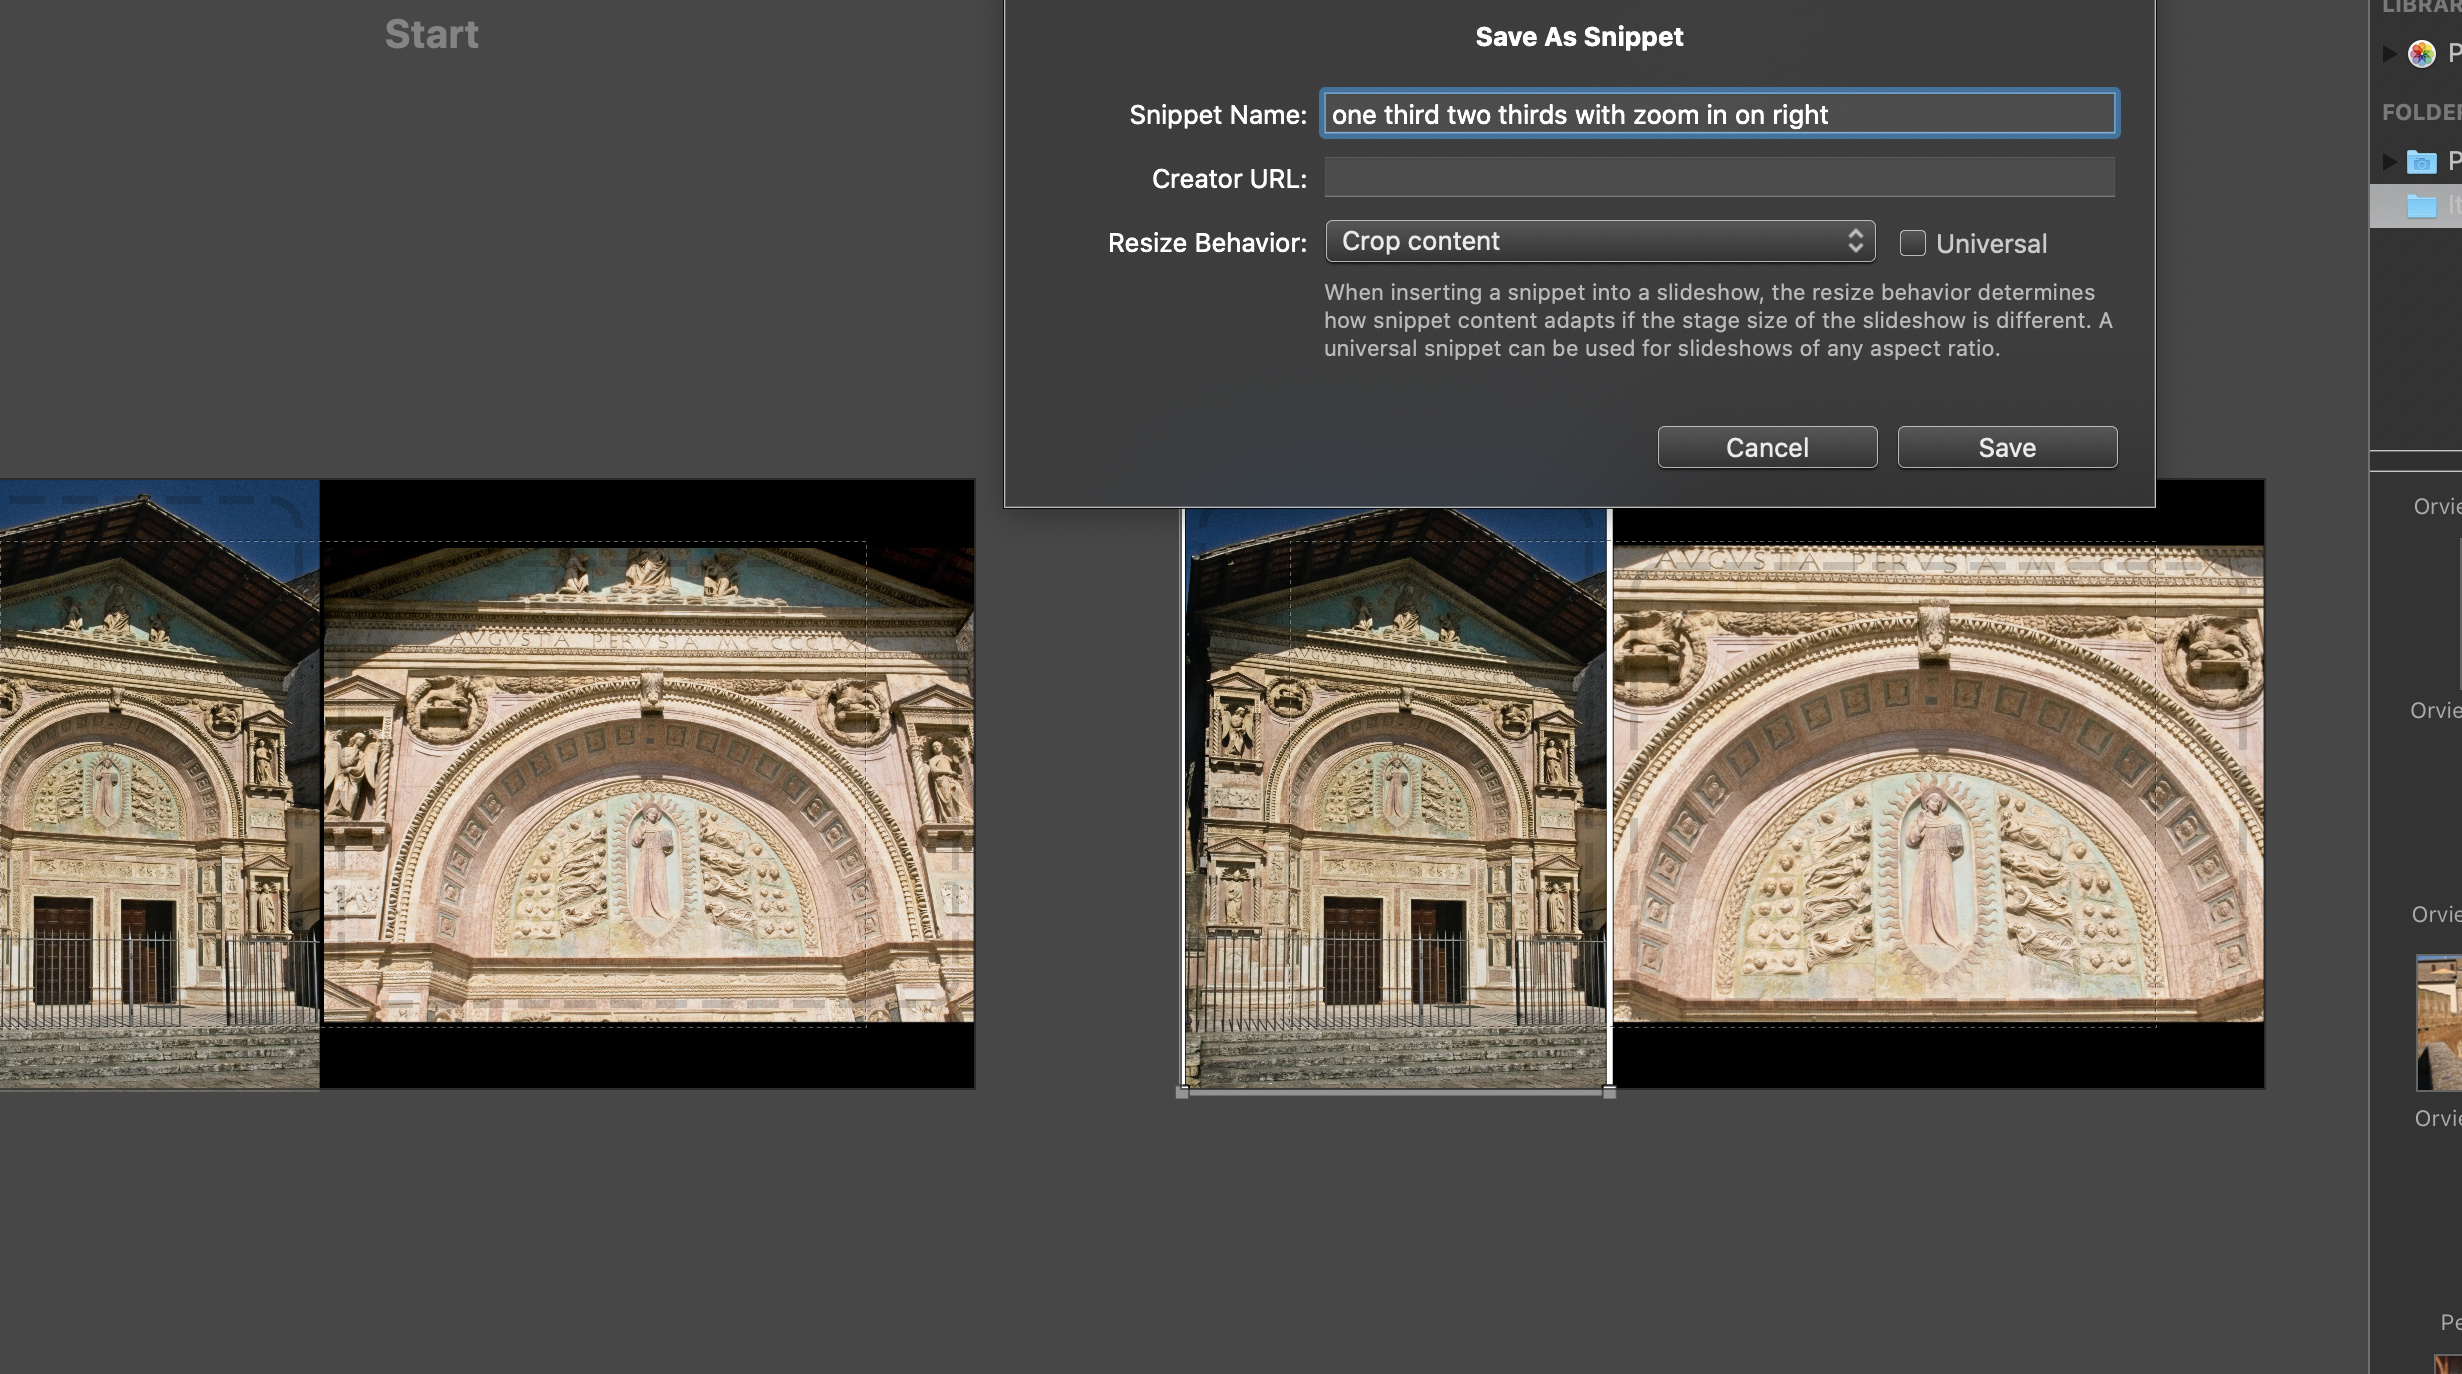
I am still puzzled about the Save as Snippet option.
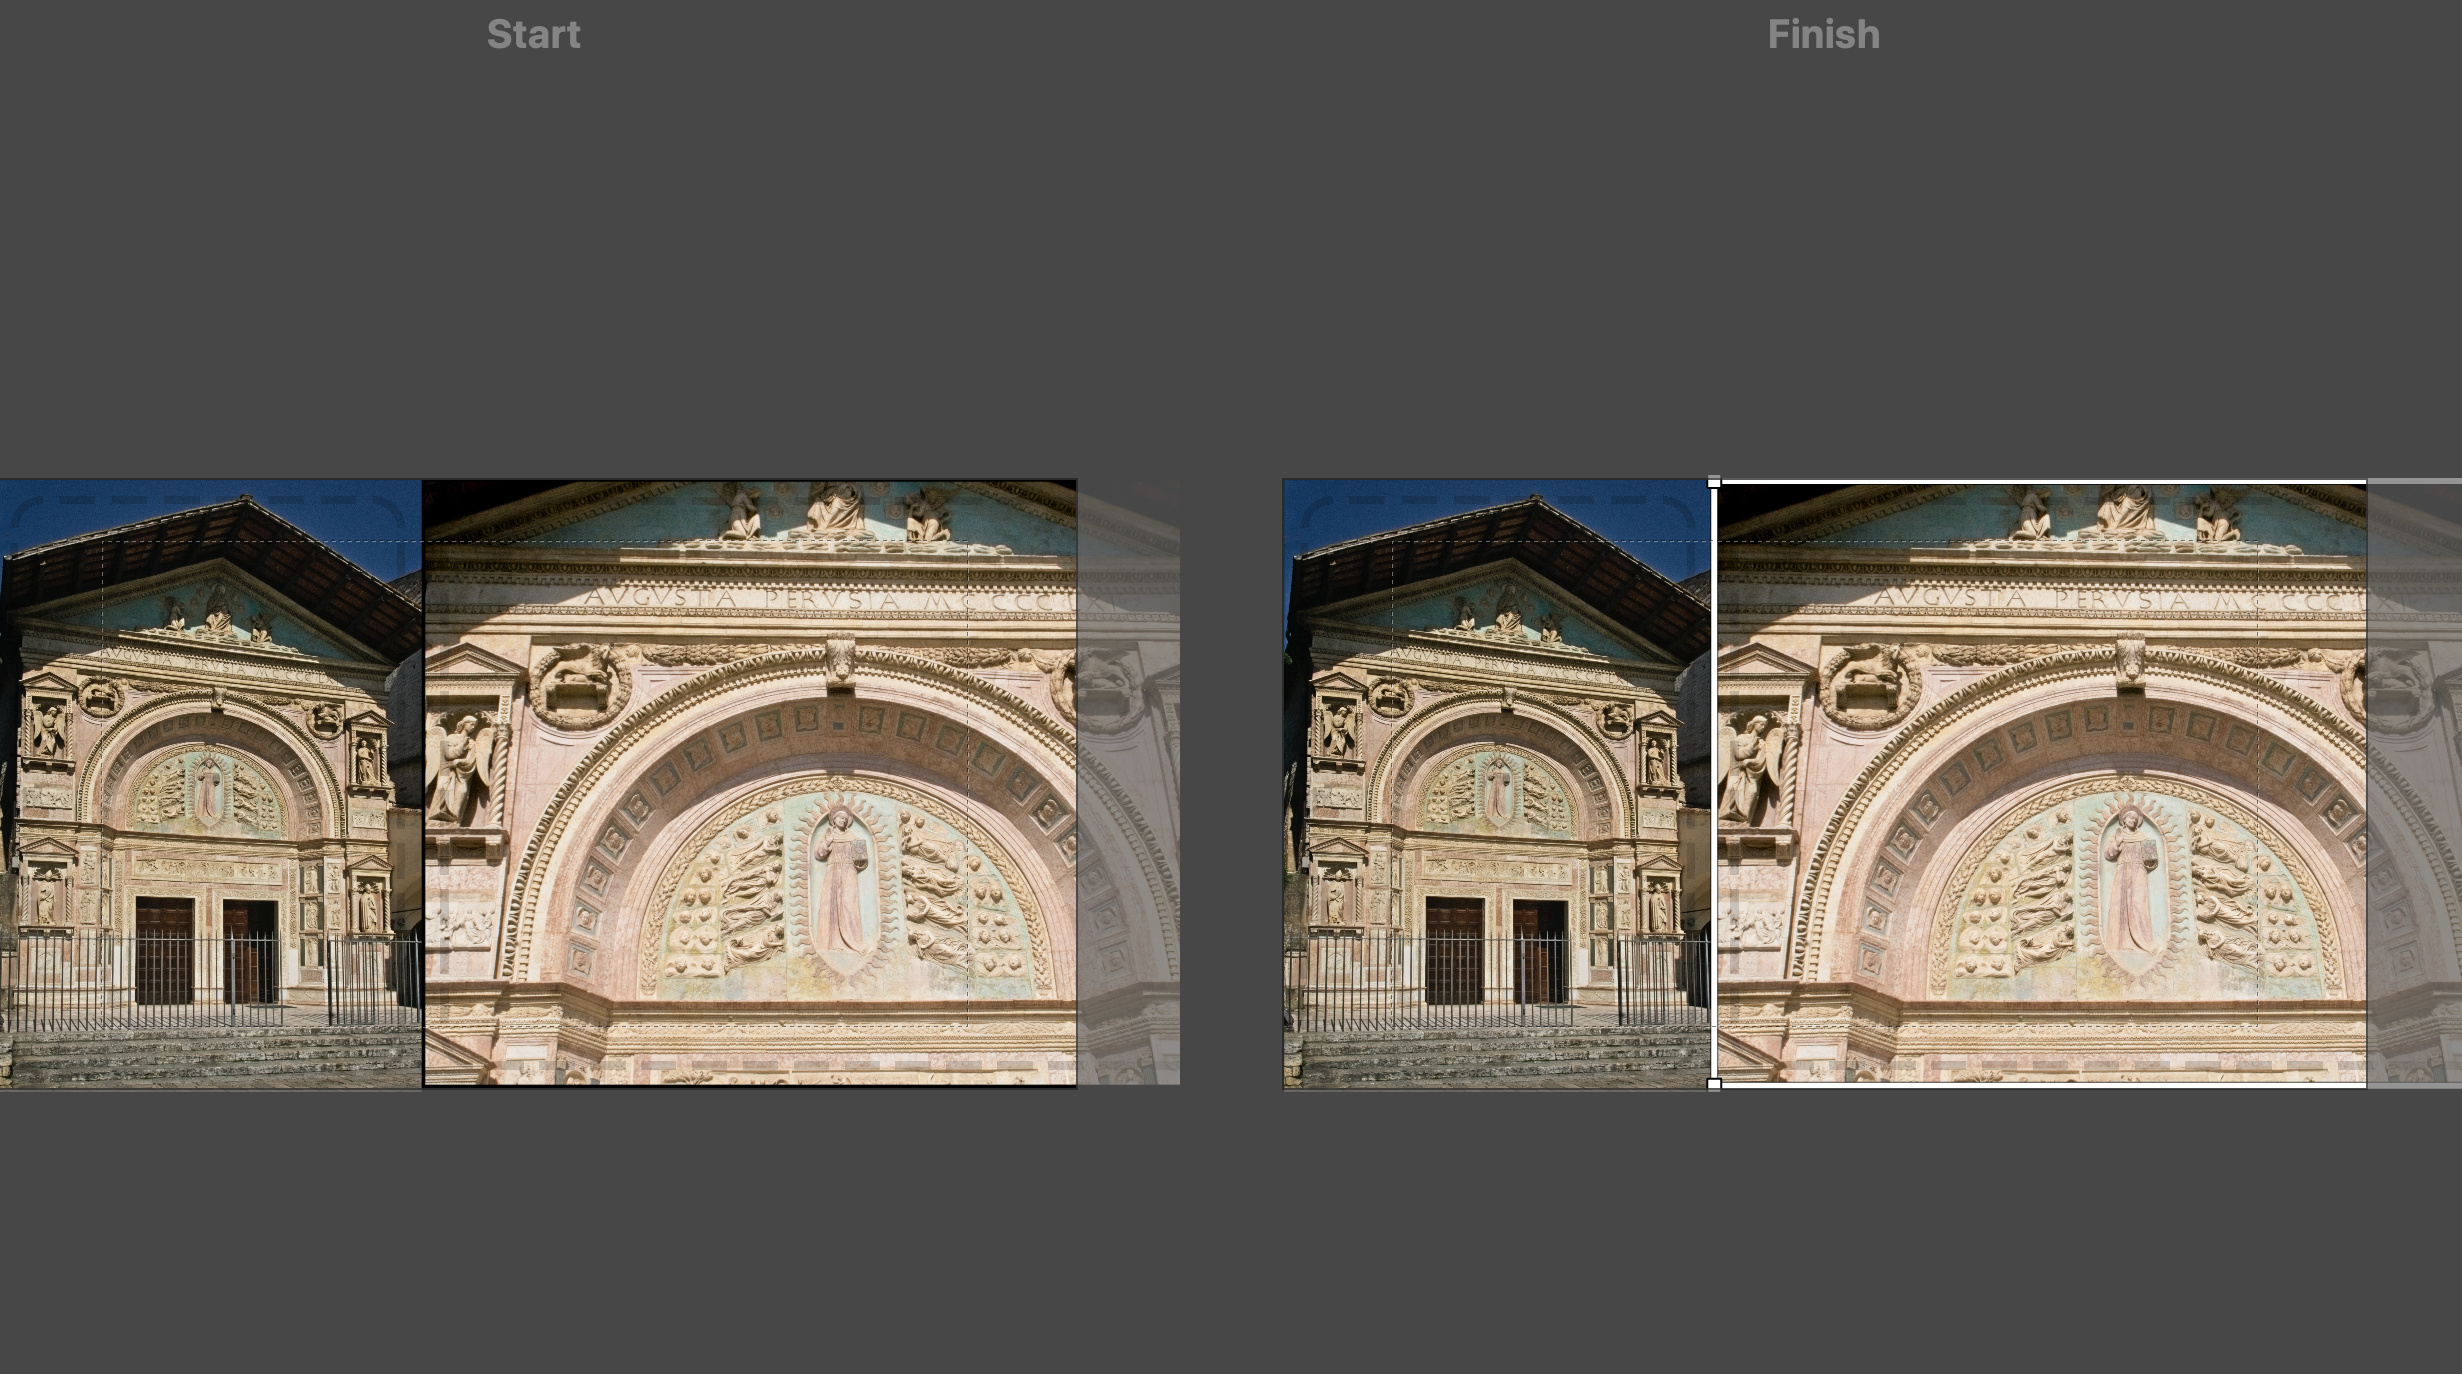
Yeah, one of the problems, of course, is WANTING to do your 1/3 2/3 screen split, but getting your original images to FIT those proportions. If you don’t want any black areas above/below or left/right, then something’s got to give somewhere – an image WILL NEED TO BE CROPPED somehow (letting the mask be in control). In the sample I posted, the llama on the left was zoomed to fit left to right (just to get you to see how the touching edges works), but trying to keep the head in that 1/3 area means having to forgo the top and bottom, otherwise it would be zoomed so much that the ear on the left and the nose on the right would just disappear beyond the mask’s edges. You can see that at work in YOUR screen grab of the right building arch – you’ve got those black bars on top and bottom – BUT THAT’S OKAY (if you’re willing to accept that in your slideshow).
Just as an FYI, MY sample shows a white background with a few lines showing behind the photos – that is the 1/3 2/3 template I mentioned a few days ago that I created in Photoshop and use to quickly create 1/4’s, 1/3’s and 1/2’s visual locations for mask edges to fall on.
Okay, and as for your snippet. Yes, FotoMagico wants to save the whole damn thing as a snippet  I found that out once by accident too. The only way out (that I know of) is to create your snippets in a brand new file – and just create the single snippet that you want and save it. If you want to create multiple slides with snippets, of course you can do that. But when you drag it in and find that you only want to use PART of your entire snippet, you’ll have to delete those slides. I found it easier – when I do use them – to create JUST the snippet I want (a single slide, for example) and save it. Then just drag it in where needed.
Hope all this helps BTW, I do NOT work for Boinx, but I just find FM so much fun (and often frustrating to work with) that I find it a challenge to come up with some clever ways to do things, having to work around its limitations. It’s not as visually robust as Pro Show Gold in Windows is, but I don’t care for all that frou-frou stuff people throw at you in a slide show anyway (LOTS of spinning titles, and stars and glitter, and fireworks effects, etc.) I like a show to be simple and let the photos themselves “make” the presentation.
Again, just post if you have a problem and I’ll try to help…
Stan
Clever idea! It never occurred to me to make a slideshow containing just one split screen and then save that as a snippet; however, I rather suspect that all my split-screens are going to be one-offs. I think I now know how to create them without too much hassle. (Why, for the life of me, a user snippet is a slide show, when all the built-in ones are blank single frames, is a mystery!)
I agree about the frou-frou-frou. I am new to creating slide shows, but all I really want to do between slides is mostly fade or dissolve. However, the show I am working on at present begins, but way of a preview, with the Photo Pile snippet. I can’t seem to stop the individual photos from zooming despite cutting and pasting the geometry. Is there anything I am doing wrong?
The problem I see in the Photo Pile snippet is that the controlling rectangles on the photo for A on slides 1 and 2, and the rectangles on the photo for B on slide 2 can’t be manipulated, because they are off the screen. For Slide 1, photo A, you CAN control the zoom on the Finish, but you CANNOT copy and paste that geometry on the Start because you can’t see it, so it always starts out at its initial zoom level, then zooms during the animation if you change it for the Finish. For Slide 2, photo A starts where it left off on Slide 1, and then B is added with “almost” the same problem. If you look closely on the Start you will be able to see the bottom right corner of the photo at the very top right of the Start frame. So you could adjust the zoom on that while you have it, and copy that zoom to the one on the Finish and that will cancel the zooming. On Slide 3, you can just see the corner of photo C, again at the top right area, so you have control over that one as well. Adjust the zoom, then copy and paste the geometry to the Finish (or vice versa). Gee, it’s so easy to type what you can do, but difficult to show you.
One of those annoying things that I don’t like is that you CAN start an image OUTSIDE OF THE FRAME, but it’s not easy to manipulate with the mouse since you can’t see any of the control points at the corners. I have the same problem when I try to do a pan of an image across the frame. If it stick one end out too far, it’s gone and I can’t get it back (or I have to move the image with my mouse). Same thing with text – I would like to pan text across the screen, but if it starts OFF the frame, it’s very difficult to control if the text block is too long.
Hope some of that makes sense. Didn’t exactly explain HOW to solve your zoom problem on the Photo Pile snippet, but maybe it’s enough to explain what’s going on. Another option is to eliminate the animation on that snippet completely, but that defeats the purpose – the photos will just POP onto the frame without sliding onto the frame, and that just looks weird.
I’ll see if I can follow through on your suggestions! Quite frankly, the Photo Pile snippet is very badly designed. Besides, I may be wrong, but I’d have thought that most people wouldn’t want any zooming at all since there is enough going on in the frame anyway.
I haven’t (yet) noticed any issues with panning panoramas. And I prefer my text to stay in the same spot when there is zooming or panning of a photo. I think any text movement is distracting and makes it harder to read.
I’ll usually place text and not move it as well. In fact, I have created a gradient from black on the left to nothing on the right (in .png format to allow for the image to be seen through it). It’s a long relatively narrow rectangle, but wide enough to hold text (from the caps to the descenders, and with space above and below). I place that on top of the image layers at the very bottom, then move it left or right so it’s black (or dark) on the left and fades out to the right – then place my text over that in a white font. I then display the text for a few seconds (long enough to read), and then fade those two layers (gradient AND text) out completely while the slide is still displayed.
For animated text, I’ll only use that if the image justifies something that would help draw attention to part of the image. Or, in one case, for my opening title slide on a show we did for New Zealand, I had Mt. Cook in the background, then created (in Photoshop) a large black rectangle (larger than my slide frame area) and placed NEW ZEALAND on it in all caps, bold, and extremely large, then deleted the letters so they were like a stencil on the black background, then saved that as a .png and placed it in FM. I panned that layer from right to left over the Mt. Cook image, and the mountain could be seen “through” the NEW ZEALAND characters. It was set to music, and I had it replicated over and over, then used that as the intro as people walked into the room to watch the show. I set the timing to proceed at a mouse click, so once the show actually started, it just went from the opening onto the rest of the show.
Hi, Londinense –
Well, oooops!! I made a mistake Went back to play with the Photo Pile snippet and I CAN SEE the image of photo A at the top left side of the first slide. So, first drag the snippet in, then click on the first slide of the three (which should just include photo A). On the Start frame you SHOULD see a triangular image area at the top left showing just a small area of the placeholder. Click in there and notice the zoom level. Adjust it to whatever you want using the Zoom dial. Then go to the Finish frame, click on the placeholder, and adjust the Zoom level to be the same as on the Start frame. NOW when the snippet plays the image will animate into place, but it will NOT zoom. That’s what you originally wanted to eliminate, I think. So do that on each of the other slides and you should get what you want.
Sorry I made it complicated. I think I had a glitch yesterday and the top left of the start frame wasn’t displaying correctly on my monitor.
I THINK I have it worked out. Thanks.
